On the whole, diving is a safe pastime, but it does have some risks. There are some key things you can do to reduce risk.
- Make sure you are doing what you can to prevent an accident from occurring.
- Make sure you are properly prepared should an accident occur.
Being able to respond quickly and effectively to an emergency increases the likelihood of a positive outcome.
Listen To Briefings
If you dive with a club, from a boat, or with a leader, you will be given a briefing. The information is to ensure your safety and enhance your enjoyment, so it’s important that you listen.
A briefing will contain:
- Entry and exit protocols.
- The time you are most at risk when diving is when you are on the surface or close to it. Each operator will have determined the safest way for you to get in and out of the water. These details will include the best practice for getting picked up too. This information can differ by dive site, so it’s important that you pay attention.
- Details of the dive plan
- Understanding depth, dive time, gas checks, and navigation helps keep the group together and ensures everyone is prepared and on the same page for these key aspects.
- Details of the dive site and conditions
- Some knowledge of the dive site will prepare you for the dive. Knowing what to expect takes away any surprises, and this makes for a calm dive.
- The plan in case of emergencies
- What you should do if you lose the group.
- What the recall signal sounds like, and so on.
- Marine life and points of interest.
- This will naturally include any marine life that has the potential to cause harm. The briefing should also include those creatures that are unusual and good to keep an eye out for, plus those that you can expect to see.
- The dive leader’s role.
- This can vary by dive and by location. It’s important to know what to expect from your dive leader, where to find them, and how to recognize them.
- Hand signals
- It’s hard to follow directions or answer a question if you don’t understand what is being said.
- Hazards
- Dive leaders are experienced in the local waters and will make you aware of things that you should look out for. Awareness can save you from making a mistake.
- Dive Register
- Every operator will have a way of checking that divers are back on board. Most operators also keep a record of dive details which can include depth, dive time, and air pressure, but it could also include your time in and out of the water. This information can be vital in an emergency, and it’s also key to understanding who has yet to return. Be clear on what’s required.
ON A BOAT YOU WILL BE GIVEN DETAILS OF:
- Off-limits areas.
- No-go areas are for your safety and the efficient operation of the vessel.
- The location of first aid and emergency gear.
- If someone needs assistance, you don’t want to waste time trying to locate the relevant kit.
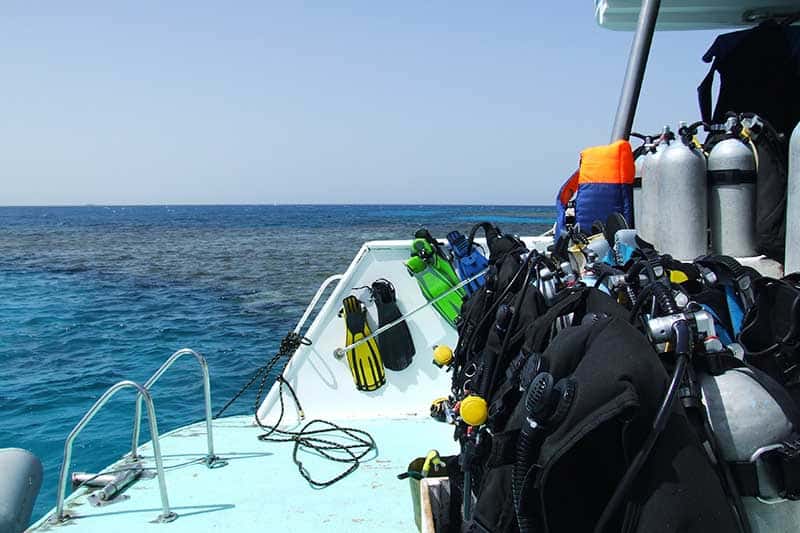
- How to set up and stow your gear safely
- Tidiness keeps aisles and walkways clear and correct stowage ensures gear doesn’t fall and hurt someone in choppy conditions.
While it is very important to listen, it’s equally important to speak up if there’s something that you don’t understand. You’re not silly, and you might find others have the same question. It’s far better to clarify and be sure than worry and guess.
HOW IMPORTANT IS A DIVE PLAN?
If you’re following a dive leader, they will have made the dive plan. It’s part of the briefing, which we noted above. Supplemental to this, it’s a good idea to discuss with your buddy how you want to dive together.
- Will you stay on the same side throughout the dive?
- How far away from each other will you be?
- Are they taking a camera?
- Are they looking for something specific?
- Do they have any equalization issues?
- Do they know they’re carrying the correct weight or have they adjusted their weight since the last dive?
- Do you both have an SMB and are you both comfortable using one?
These points will help you stay together and highlight any areas of concern.
If you’re diving independently with your buddy you need to make a plan for your dive which will include;
- Entry and exit points
- Conservative dive time, depth, air limits
- Navigation
- Objectives
- Lost buddy, out of air, and other emergencies
The key thing with any dive plan is to stick to it. Deviation from a dive plan means that any information left with surface support will be inaccurate.
Further, if you go deeper, stay longer, or ignore gas limits, you’re putting yourself at risk of decompression sickness and running out of air.
Also, note that you could put your buddy in an uncomfortable or dangerous position if you do something that you have not discussed. Your buddy might only be comfortable or qualified to dive to a certain depth. Maybe they’re not comfortable with a swim-through that you had not discussed. Entering a wreck or cave without the proper skills and gear is dangerous and leaves your buddy with a decision that they’ll wish you hadn’t forced them to make.
DIVING WITH A BUDDY
How Important Is a Buddy Check?
When you learn to dive, you are taught to make a buddy or safety check before you get in the water. Each agency has a way for you to remember it and a process that they advise you to follow.
Ultimately how you do it doesn’t matter, as long as you do it. Not only does a buddy check verify that each aspect of your kit is present and working but it familiarizes you with your buddy’s kit and vice versa. This knowledge can save vital seconds in an emergency scenario.
If you have any new kit, make sure you’ve checked it thoroughly. Is your new scuba mask a good fit? Make sure there are no leaks prior to diving. Is the snorkel comfortable if you have to use it?
What Should A buddy Check Cover?
Buoyancy device:
- How does the BCD or wing inflate and deflate?
- Where are the dump valves?
- Are the releases properly fastened and how do they operate?
- What are they carrying in their pockets?
Dive Weight System
- Is it present?
- How / where are the weights carried?
- How do you release them?
Air
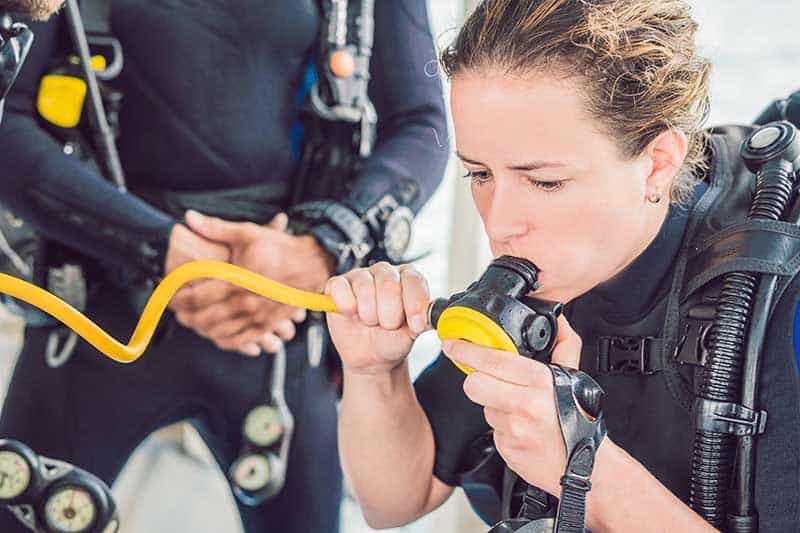
- Is it turned on?
- Is it breathing correctly?
- Are there any leaks?
- Where is the alternate?
- How will you share air?
Mask, snorkel, and fins
- Are they nearby / on / ready to go?
(specific to the diving scenario)
Gauges and accessories
- Are wrist-mounted gauges present and correctly configured?
- Knives, cameras, SMBs, slates, noise-making devices, and other emergency gear.
- Are they being taken?
- Where are they stored?
Don’t become complacent. There’s no excuse for skipping the buddy check. You are never too experienced not to make a safety check. It doesn’t take long, and it might just save your life.
Follow Established Dive Protocols
- Never hold your breath.
- Don’t dive alone.
- Check your gauges regularly.
- Don’t touch, tease, or chase marine life.
Also, remember that any diver should feel free to end a dive at any time for whatever reason. No questions asked. Having the freedom to do this can prevent a situation leading to panic.
Similarly, if you don’t feel that a dive is for you, don’t do it. There’s no shame, and there shouldn’t be any pressure. Sure, other divers might seek to allay your fears because there might’ve been something you misunderstood. However, it’s your dive to make or not. Never feel obliged.
HOW TO AVOID LOSING YOUR DIVE BUDDY & WHAT TO DO IF YOU DO
Realizing you’re alone underwater can be frightening. In this section, we offer dive tips on how to reduce the risk of it happening to you as well as what to do if it does.
Pre-dive
Whether you’re diving with an operator and as part of a group, or independently with your buddy, your dive plan is your blueprint. An operator will brief the dive, but if it’s you and your buddy, you’ll talk it through.
Navigation is one of the aspects that should be included in a dive plan. If you know where you are going, it’s easier to stay together as you’re less likely to wander accidentally in the wrong direction.
If you’re diving with someone new, it’s a good idea to discuss distance and contact. How far away from each other are you going to dive? Are you going to stay on the same side throughout the dive? What is the anticipated visibility, and how does that affect how you will dive? These parameters try to ensure you maintain contact but also make sure it’s easy to find each other and communicate.
Among the emergency procedures to review is your missing diver protocol.
General Rule
If you find yourself lost or alone underwater, training agencies recommend that you look around for 1 minute. If you can’t reunite underwater, then you should ascend to the surface and reunite there. You should maintain a safe ascent speed, but you shouldn’t do a safety stop.
Most missing diver situations end happily, but in the instance that something has gone awry, spending 3 minutes making a safety stop could be vital time lost. Remember, it is a safety stop only and not a required decompression stop.
Crucially, when you get to the surface, you stay there. Don’t pop up, look for your buddy, find they’re not there, and go back down again. You could easily miss your buddy doing this, and it’s quite likely that you have drifted from where you lost them.
STOP, BREATHE, THINK, ACT.
The process for handling any situation underwater is: stop, breathe, think, act. This process helps ensure that your reaction is considered, reducing the possibility of panic. If you have discussed and visualized a plan for being alone, it will further aid a smooth reaction.
Looking Around
If you’ve been maintaining contact, your buddy should not be far away and so, looking for them is often successful.
The conditions play a role in your search. In a very strong current it might be near to impossible to search, in which case going directly to the surface is your best option.
Lower visibility certainly hampers a search, but the same principles apply no matter how far you can see. Start by looking around you, make a full 360-degree turn, and remember that your buddy could also be above you. If you have no luck, ascend a few meters and make another turn, this time looking for bubbles. If still no luck, then make your best guess as to the direction you think they might be and look there. Remember, if you’re a little shallower, you increase your search area; look for bubbles.
Note: if you’re night diving, turning your torch off or shielding the light helps you see other divers lights.
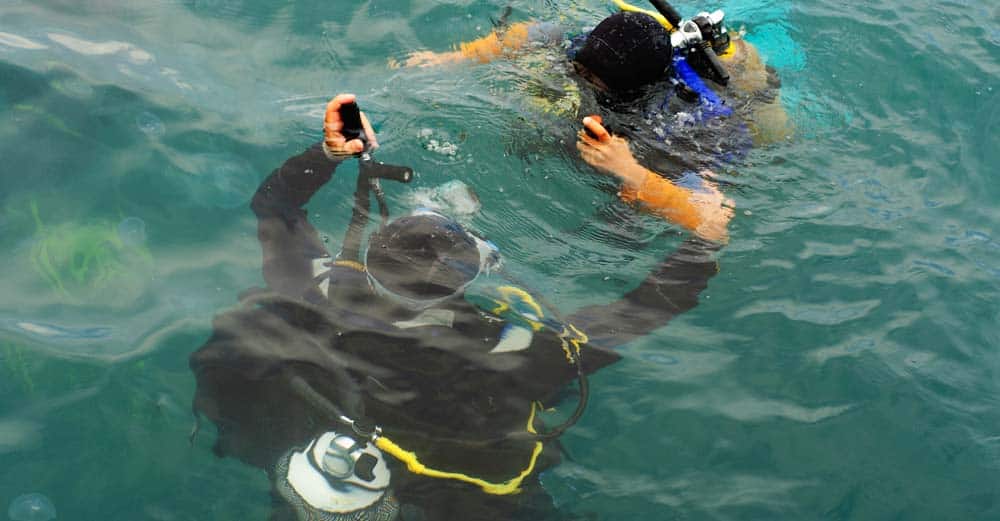
Surface
If you’ve had no luck, it’s time to surface. If you have an SMB and a reel with a long line, you might consider sending it to the surface but fastening it underwater. In case your buddy is missing, this marks the place you missed them, which will be useful in a search effort.
Remember to follow safe surfacing procedures and keep a good lookout for bubbles.
It is possible that it took your buddy a little longer to notice that they’re alone, which means they’re still on the way up. If you’re diving with a group, they might’ve mixed you up with another diver or, in busy locations, another group.
Hopefully, your buddy is on the surface waiting for you, but if not, you need to decide on your next course of action. If you have surface support, signaling them for assistance alerts them to a problem; however, you will need to speak to them to explain the situation.
What Next?
In an emergency, there are so many variables that it makes it difficult to summarize a response in an article. Are there divers still in the water? Are there fresh divers to initiate a search while emergency services respond? Does the missing diver have a beacon?
It’s at this point that a good emergency action plan is worth its weight in gold. It’s specific to your diving situation and relevant to your location. No matter whether you’re diving with an operator or independently, make sure there is one.
Lost At Sea
Of course, there is another side to this. What if it’s you who is lost? Whether with your buddy or alone, surfacing to find no boat is not great.
If you’re not on your own, fasten yourselves to each other as this ensures that you stay together. Staying together means you form a larger shape which is easier for searchers to see.
If you’re on the surface for a while, not having to kick to stay together will also save you energy. Dropping your weights will help too.
Again, in this situation, there are quite a few variables. The first thing to consider is if the boat has left without you or if you’re not where you’re supposed to be. If you think they have left without you and there is a buoy or marker for where you were diving, stay with it because this is where any search will start.
If you can make it to land, you might want to consider dropping your tank too so that your swim is easier.
If you are drifting or have been swept off the site, you need to do everything you can to make it easy for a search team to find you.
Enjoying this article? You might also like:
SAFETY GEAR THAT YOU SHOULD CONSIDER OWNING
Nautilus Lifeline
Personal locator beacons might seem a bit excessive, but if you are drifting, you’ll be thankful you invested and they cost a lot less than you might imagine. We like the Nautilus because there is no subscription to pay.
It works straight out of the box, and it’s very easy to use; push one button to activate the beacon. The Nautilus is robust and rated to 130m / 425ft and is universally compatible. It’s accurate to 1m / 3ft and broadcasts up to 55km / 34 miles.
Storm High Visibility Surface Marker Buoy (more on this below)
This SMB is a 6ft long marker with a reflective strip. Divers heads bobbing on the surface can be quite difficult to spot and keep sight of particularly if the water is choppy. A large SMB will help searchers locate you.
Finger Reels (more detail on this below)
You will need a reel to go with your SMB. Get a long one because, in the case of a missing buddy, you can attach your SMB and reel to the last known location. This gives you an ascent line but also marks the location should a search be required.
Storm Safety Whistle
You can also make noise to attract attention, and if you need help, you want to make as much noise as you can. This whistle is the loudest in the world.
Signaling Mirror
Yes, it’s old school. Yes, you need the sun to shine. But they are extremely effective over distance and might be the thing that catches your rescuers’ eye. They’re cheap and don’t take up much room. Be sure to practice before you need it.
Fluorescent Dye
This product creates a patch of fluorescent green water, making it easier for searchers to locate you.
Vindicator Scuba Tank Safety Valve / Handle
This device replaces a tank’s valve handle. The handle provides an easy-to-see visual reference that will show if the tank valve is open or closed with a single glance. They’re a great idea for peace of mind.
HOW TO USE A SAFETY SAUSAGE
A safety sausage is another name for an SMB. SMB stands for surface marker buoy. A surface marker buoy marks your underwater position on the surface so that other water users can determine your location.
No matter what you call it, it’s imperative for your safety. You are at greater risk on or close to the surface than at any other point in your dive. In some locations, you are required to have a marker on the surface for the entire duration of your dive. Check what is required where you dive.
HOW TO INFLATE A SURFACE MARKER BUOY
Using a safety sausage that you inflate underwater and send to the surface is not difficult, but it does take a little practice.
The biggest danger when sending a safety sausage to the surface is that you get tangled with the line and ascend too quickly.
Like all new skills or gear, start in shallow water.
- Make sure that your reel is attached to the SMB but don’t unravel the line.
- Make sure you have control of your buoyancy and if possible, have a visual reference to help.
- If there is a current, turn your back to it so that your SMB isn’t pushed into you.
- It’s a bit fiddly, but you need to hold the SMB open and hold the reel with that hand too.
- Use your other hand to take your alternate second stage to squirt some air into the tube.
- This bit takes a bit of practice for you to understand how much you need. The deeper you are, the less air you need because of expansion but remember, you want it filled well enough so that it will stand full and upright on the surface.
- As soon as you feel the SMB tug away from you; let go. You can use your finger as an axle for your reel, let it spin on your hand, or let it go to spin in front of you. If it does catch and goes up, it will unravel and come down to you.
- You will see some divers fill their SMBs from the exhaust of their primary second stage. There’s nothing wrong with this, but it does bring the SMB and reel closer to you and increase the potential of snagging.
- Once the SMB has reached the surface, you can clip the line off to the reel. As you’re ascending, you can use the clip to wind the reel up as you ascend. Never clip the reel to yourself; if overhead traffic should catch the SMB, you want to be able to let it go.
- Once you are at the surface, don’t deflate your SMB until you’re at the shore or boat.
WHICH SMB TO CHOOSE?
The Two Versions Of SMB
As the name might suggest, an SMB is sausage-shaped.
The simplest versions are sock-like; sealed on the top and along the sides but open at one end so that you can inflate it. These are not ideal. When they arrive at the surface, they can fall over and spill the air. They deflate and won’t be visible. This type is often made of poorer-quality materials and is not durable.
To stop spillage, the better versions have a one-way valve instead of an open end. These SMBs will have an over-pressure release and dump valve to save them from exploding and to enable you to deflate them.
Two Colours Of SMBs
Orange is the most common color but you will see yellow versions.
Typically, yellow SMBs are used to signify something different, i.e. a diver needs gas or assistance or whatever might’ve been agreed before the dive. This protocol is only usual on dives involving decompression.
Some SMBs have one side yellow and one orange. There is debate as to which color stands out best. Having both colors on one safety sausage means you get the best of both worlds. However, if surface support is watching an orange SMB, it’s confusing if it rotates and becomes yellow.
Our advice would be to stick to orange.
Is The Size Of SMB Important?
Safety sausages come in different sizes. It’s advisable to get a large one because you want to ensure it can be seen in choppy conditions.
Our recommendation would be 6ft tall.
Other Features
It’s ideal if your SMB has:
- a clip or method of storage for easy carrying,
- a reflective strip to increase visibility, particularly at night,
- an oral inflation pipe that allows you to top the SMB up once you’re on the surface.
OUR CHOICE OF SMB
Storm High Visibility Surface Marker Buoy
This SMB is bright orange and 6ft long. It has a one-way and oral inflation valve for filling. There’s a clip for storage and a band onto which you can attach a reel. The overpressure release and dump valve are robust and easy to use. At the top of the buoy is a reflective strip.

REELS
Finger reels have holes in the spool’s outer so that you can clip off the line.
It’s important to choose a reel with a decent length. It’s good practice to send it up before your safety stop so you’ll want more than 5m / 15ft of line. Remember too that if there’s current, waves, wind, or if you want to tow it for the dive; you don’t want to have problems due to the length of your line. A 30m / 100ft line might seem a bit excessive, but it’s the popular choice.
OUR CHOICE OF REELS
Finger Reels
This reel is 30m / 100ft and is a great choice. Its color makes the line easily visible, and it comes with a double-ended clip.

HOW TO REDUCE YOUR RISK OF DECOMPRESSION SICKNESS
When you learn to dive, you’re taught how to make a dive plan that keeps you within no-decompression limits. You’ll learn to use a dive table and a dive computer. These tools do not monitor anything in your body; they’re based on an algorithm. This means that even when you plan your dive within established limits, you’re still putting yourself at some risk. There are steps that you can take to reduce your risk of getting the bends scuba diving.
Hydration
Dehydration is a significant factor in cases of decompression sickness. If you’re not hydrated your circulation system is sluggish. Sluggish circulation will not expel nitrogen optimally. It’s easy to get dehydrated after a long flight or when diving in hot weather, so make sure you’re drinking enough water. Remember caffeinated drinks and alcohol are diuretics, which dehydrate you further.
Be Conservative
Never dive to the limits of what the table or your dive computer advises. Build in some conservatism; this is particularly important in cold conditions or for dives where you might be working harder than a simple reef tour. Making multiple dives a day on consecutive days also requires conservatism.
Have a Smooth Dive Profile
Dive tables and computer algorithms were created and tested on the basis that you descend to your deepest point and then gradually ascend. Sawtooth profiles, where you ascend and descend repeatedly, are not recommended because they fall outside of what has been tested.
Ascend Slowly
Recommendations for ascent speeds vary between 9 m and 18 m per minute. Take it slowly. Your computer likely has the slowest speed setting, don’t exceed it.
Make A Safety Stop
A safety stop is a pause for 3 minutes at 5 m. Between 10 m and the surface is where the biggest pressure change occurs. Stopping in the middle of this range allows your body a little extra time to get rid of nitrogen before you make your final ascent to the surface.
It’s not mandatory; it’s not a decompression stop which means in an emergency you can skip it. Unless it is an emergency, do it.
Drugs And Alcohol
It’s inadvisable to dive under the influence, and this includes any residual effects from the night before. Alcohol dehydrates you too, so you need to be prudent with your consumption the night before. If you’re taking prescription medicine, check with your doctor before diving.
Exercise
Exercise changes your circulation. For this reason, it’s advisable to refrain from vigorous exercise pre or post-diving.
Be Fit And Healthy
You have a responsibility to yourself and your fellow divers to be fit enough to dive. Being sick, unfit, or overweight puts you at increased risk of decompression sickness but also has other risks. You need to be in good condition to eliminate nitrogen effectively; being overweight or unfit has an impact on your circulation.
If you don’t have the strength or stamina to deal with an extended surface swim or current or assist your buddy in these conditions, then you could put your dive team at risk.
Note that some locations require a dive medical verified by a doctor before they will allow you to dive regardless of whether you have any of the conditions listed on the RSTC medical statement.
Flying After Diving
Flying too soon after diving puts you at risk of decompression sickness. Unless you’re diving at altitude, dive tables and computers work on the basis that after your dive you will return to sea level.
When you fly the pressure surrounding you is less than sea level. Reducing pressure allows dissolved nitrogen in your tissues to come out of solution. If you reduce the pressure surrounding you too quickly, nitrogen bubbles form in your tissues, which can cause decompression sickness.
Dive agencies and dive medical advice recommend that you wait for this residual nitrogen to leave your tissues before flying.
Dive computers will calculate your no-fly time, but the accepted guidance is;
- Wait 12 hours if you have made a single no-decompression dive,
- Wait 24 hours after repetitive, multiday, or decompression diving
At altitude, the pressure is less than at sea level, and the protocols are a little different.
Take training to dive at altitude safely.
Note that your airline may also have guidance and refuse to let you fly if you do not meet their requirements. Further, it’s likely that your insurance would not cover you for hyperbaric treatment should you fly contrary to recommendations.
Diving after flying is not the same, but it does carry some risks that you need to assess. Short flights are not usually a problem, but long-haul flights can leave you tired and dehydrated. It’s advisable to take some time upon arrival to rehydrate and rest. The medical community recommends 12 hours but states that 24 hours would be better.
SCUBA GEAR – SAFETY CHECKS & MAINTENANCE
“Look after your gear, and it will look after you.” It’s a well-used cliché, but it’s true.
Your BCD and regulator should be serviced to make sure they’re in good working order.
Every other piece of gear should be inspected too.
- Check your mask’s strap and skirt.
- Your dive fins need to be checked for cracks along the blade. The straps should be checked for cracks, tears, and perishing. Are the buckles damaged?
- Check zips and seams on wetsuits and seals and zips on dry suits.
- Check your weight system. What you check will depend on what you use but look for wear.
- For wrist-mounted gauges, check the straps and, where applicable, the batteries.
- If you’re carrying a slate, check the pencil works.
- Verify that any other accessories are in good working order too.
Gear does fail, so putting together a relevant assortment of spares and carrying them with you is a good idea. That way you won’t miss a dive because your fin strap broke.
Carry The Right Gear
Standard Scuba Diving Kit includes:
- BCD
- Regulator
- SPG
- Weight System
- Mask
- Snorkel
- Fins
- Exposure Protection (wetsuit)
Prudent Additions To Your Standard Dive Kit
- Dive knife
- A way of attracting attention on the surface and underwater
- Surface marker buoy and reel
- A Timer or dive computer
- Compass
- Slate
- Spare mask
Other activities may require a specific kit, for example, for a night dive, you need a torch and a backup. Make sure you have what you need for the dive that you are planning.
Our Recommended Dive Safety Kits
XS Scuba Save A Dive Kit
Carry spares of those items that could break and you won’t have to sit a dive out if they do. This kit has a mouthpiece, cable tie, fin strap, mask strap, O-rings, snorkel retainer, and weight keeper.

Innovative Scuba Concepts Deluxe Diver Tool & Repair Kit
This kit includes a simple selection of the tools required to help make simple repairs. Apart from the tools specially selected for scuba gear repairs, there are silicone grease, O-rings, and cable ties.

PREPARATION AND RISK MITIGATION
When you learn to dive, you’re taught a variety of skills and techniques. Some of the skills you learn are put into practice on every dive. There are other techniques that you’re taught that, hopefully, you will never have to use. These self-rescue skills don’t become important until you need them. If the last time you practiced them was when you learned them, they’re not going to be fluid. It’s possible that you might not even remember what they are and how to do them.
The standard advice is that if you have not dived for longer than six months that you should take a refresher. The refresher will run you through all the skills you learned during your entry-level course. However, if you dive regularly, there’s no recommendation for doing a refresher. This means that your self-rescue skills could become rusty.
What Should You Practice Regularly On A Dive?
- Regulator recovery and clearing
- Out-of-air scenarios
- Mask removal and replacement
- Cramp removal
- Towing a diver
- Removing and replacing your gear on the surface and underwater
- Breathing from a free-flowing regulator
- Response to accidental weight loss
- Response to malfunctioning LPI
Practice should take place in a calm, shallow, and controlled environment.
It’s not just the basics that you need to refresh. If you’ve trained in rescue techniques or other specific skills, practice them so that you can call on them when needed.
Emergency Action Plan
Knowing what to do in an emergency is crucial to a fast response. The more efficient your response is, the more likely a better outcome. A plan should be clear, easy to follow, and readily available. It should include;
- Emergency contact information including method of contact
- Radio frequencies
- Phone numbers
- Landline / mobile / satellite
- Process for handling emergencies, specific to the dive location
- Guidelines for recording key information to assist rescue and medical teams
- Location of first aid equipment
- Details of how to direct emergency services to your location
- Location of the closest medical facility
- Relevant qualifications of the dive team
First Aid Kit And Emergency Oxygen
There should always be a first aid kit and emergency oxygen available when diving. These items are key to providing initial care. If they’re not available, you’re putting yourself at risk.
When suspected, decompression sickness is treated immediately by giving the diver emergency oxygen to breathe, the subsequent hyperbaric treatment requirement is reduced.
We Recommend
The Trident Kit first aid is ready-made and comes in a hard-waterproof box.
It contains:
- Wound Care(1)
- 5″x9″ Abdominal Pad(8)
- 1″x3″ Woven Adhesive Bandage(4)
- Butterfly Adhesive Bandage(1)
- 2″ Gauze Bandage(6)
- 3″x3″ Gauze Pad(2)
- 2″x3″ Gauze Pad(1)
- x10yd Cloth Tape Triangular Bandage Skin Preparations(4)
- Alcohol Prep(4)
- BZK Towelette(1)
- Burn Free Gel(2)
- 1% Hydrocortisone Cream(2)
- Sting Relief Wipe(2)
- Triple Antibiotic Ointment Instruments(1)
- 3-1/2” Stainless Steel Forceps(1)
- Pair Large Nitrile Gloves

Training And Qualifications
To be better prepared to deal with an emergency, you can take training. Whether it’s BSAC or PADI, or any other dive agency, they’ll have a course designed to help you;
spot problems before they happen,
learn and practice skills that will enable you to respond to emergency scenarios,
plan for, respond to, and manage emergency scenarios.
Apart from in-water skills, having first aid and an oxygen provider qualification will give you the skills and the confidence to offer assistance to an injured diver.
However, it’s not just about your ability and qualifications. If you’re diving with a group, no single person needs to do everything. Great emergency management means delegation. To assign roles effectively, you need to know what everyone is qualified for and comfortable with. Even new divers can have a role in recording data or watching the surface. If you spend some time considering each diver’s capabilities before you dive, you’re prepared should any response be required.
Insurance
Hyperbaric treatment and evacuation cost money. Most locations and operators will not let you dive without dive insurance. Regardless you’re putting yourself at risk if you don’t have insurance as it can slow response and leave you with a huge bill.
Visualization
What if?
Potential scenarios could range from a reverse block to a missing buddy. If you have thought through what you would do, it will make your response calm and measured should you need it.
Having a dry run in your mind allows you to weigh up your options without pressure. Ask fellow divers too as this will spark more debate and provide solutions that you haven’t thought of.